OpenFace Installation
This page will help you install OpenFace model that is stored as Docker Image, starting from on how to install the docker.
- Installing Docker Images
If you have installed Docker
NOTE: Make sure to sign in first so you can download the docker image

And then execute this command to download OpenFace model
docker pull opendbmteam/dbm-openface
Done!
If you haven't, here's the instruction on how to install Docker
The instructions are a bit different depending on your development operating system.
Development OS
- macOS
- Linux
- Windows
Follow the instruction in the official website
Follow the instruction in the official website
Follow the instruction in the official website
IMPORTANT NOTE:
- Please follow the instructions to install WSL-2 as system requirements instead of Hyper-V. Because we relying on WSL command to execute OpenFace Model.
- After you installed WSL in Linux kernel update package:
- Make sure to execute "wsl --set-default-version 2"
- Make sure to choose Ubuntu as Linux distribution of choice
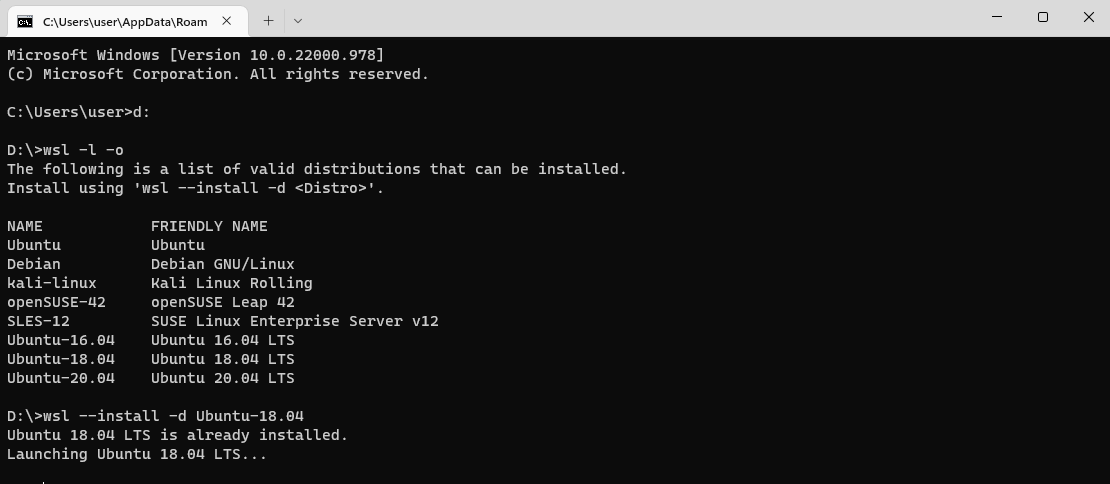
- wsl -l -o to list distribution
- wsl --install -d Ubuntu-18.04 to install Ubuntu Distribution
- After WSL and Docker is installed. check if Docker use WSL Integration by go to the Settings > Resources > WSL Integrations, and then enable Ubuntu as our Linux Distribution.
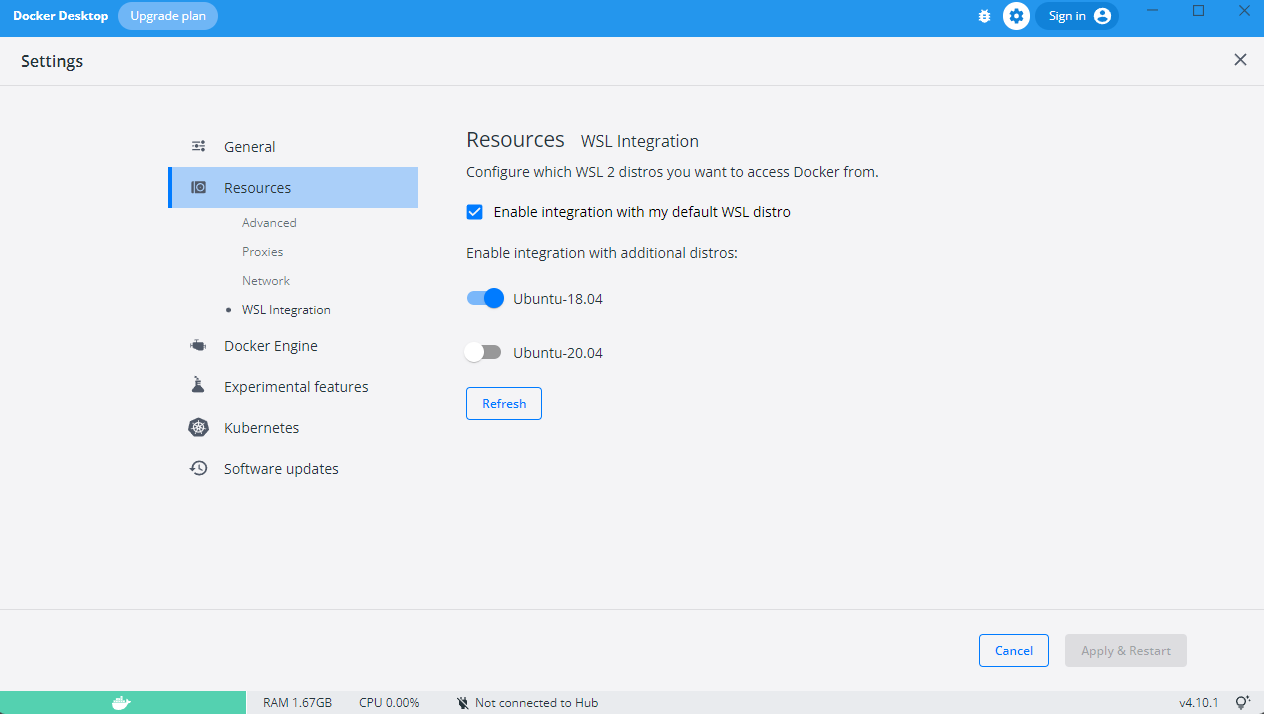
WSL Integration in Docker Setting
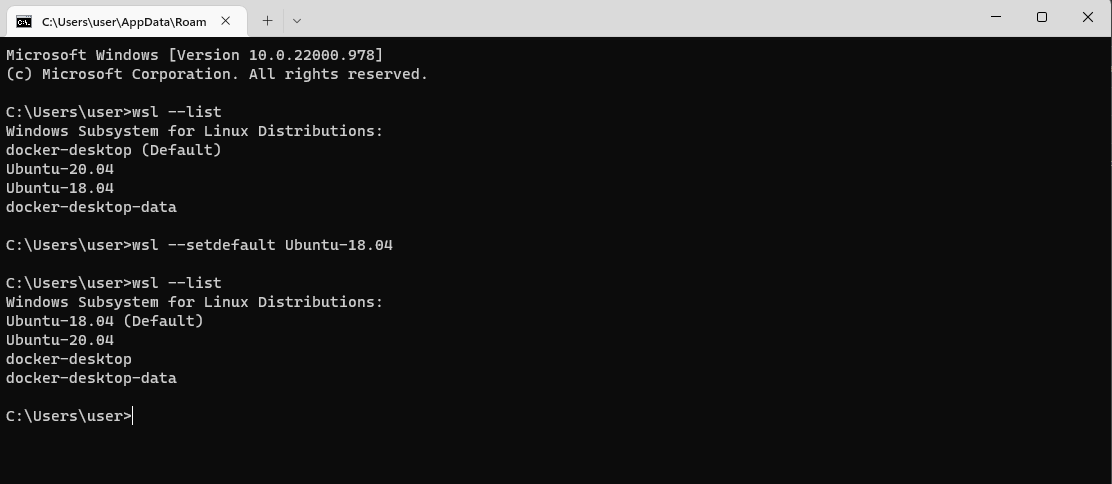
- Make sure check and set wsl distributions to Linux distributions of your choice. In powershell/command prompt:
- Type wsl --list to check WSL distributions list
- wsl --setdefault {Distribution Name} to set the default distribution (Use Ubuntu)
- wsl --list again to check if wsl default is set
- And it's done! Now you can go to the next step by pulling the docker image from the step above